Fighting spam and phishing with rspamd: a somewhat complete guide 🥊
Boost your self-hosted mail server’s spam defense with Rspamd! Sharing tips on setup, configuration, and optimization for better filtering and security. 🚀

Introduction
I was recently frustrated by some spam emails regularly getting through to my inboxes, despite my original setup of SpamAssassin + Pyzor + Razor. Not only were they not properly detected, but I also struggled to fine-tune and fully understand SpamAssassin’s operations. So, I decided to give Rspamd a try—and I’m super happy with it! It offers great built-in features, including a sleek web interface for configuration and monitoring.
During the migration, I ran into several challenges:
- Some issues were specific to self-hosting and storing emails on a local drive at home, requiring deviations from the official documentation.
- The official rspamd docs, while helpful, had room for improvement in terms of clarity, flow, and thoroughness.
- A few guides and tips I found online were outdated or unnecessarily complex.
- I struggled to find examples that addressed my specific needs.
So I thought I’d gather some tips and share them here 😃
Pre-requisites
This post will be based on running rspamd as spam protection agent on Ubuntu in combination with postfix (MTA) and dovecot (MDA). It assumes that both are already fully installed and configured for receiving and sending emails. Their initial setup is not covered here.
To make this guide easy to follow, the post is structured as follows: we’ll begin with the necessary installations, covering Rspamd itself along with Redis, Pyzor, Razor, and Unbound. Next, we’ll go through preliminary configurations to ensure these components work together. Then, we’ll dive into Rspamd’s key modules, detailing their setup and adjustments for effective spam filtering. Finally, we’ll explore fine-tuning and extra features, including logging, web interface setup, and automatic spam learning for an optimized spam filtering experience.
Installation
We will need four different set of packages: rspamd, redis, pyzor+razor and unbound.
rspamd
Installing rspamd itself is well documented on its website's Downloads page. The latest stable version (3.11) is currently available and installed following those instructions on Ubuntu 24.04.
sudo apt install -y lsb-release wget gpg  # for install
CODENAME=`lsb_release -c -s`
sudo mkdir -p /etc/apt/keyrings
wget -O- https://rspamd.com/apt-stable/gpg.key | gpg --dearmor | sudo tee /etc/apt/keyrings/rspamd.gpg > /dev/null
echo "deb [signed-by=/etc/apt/keyrings/rspamd.gpg] http://rspamd.com/apt-stable/ $CODENAME main" | sudo tee /etc/apt/sources.list.d/rspamd.list
sudo apt update
sudo apt --no-install-recommends install rspamd
I removed the addition of the source code repository (we don't need it as a simple user)
redis
As explained in the docs, rspamd uses redis as a highly efficient key-value database for many of its modules.
On this other doc page, rspamd recommends to run multiple instances of redis to facilitate backup and replication on multiple servers. However, for a small, single-instance mail server, this is unnecessary. We can simply install Redis via the APT repository, as explained in the docs.
sudo apt install lsb-release curl gpg
curl -fsSL https://packages.redis.io/gpg | sudo gpg --dearmor -o /usr/share/keyrings/redis-archive-keyring.gpg
sudo chmod 644 /usr/share/keyrings/redis-archive-keyring.gpg
echo "deb [signed-by=/usr/share/keyrings/redis-archive-keyring.gpg] https://packages.redis.io/deb $(lsb_release -cs) main" | sudo tee /etc/apt/sources.list.d/redis.list
sudo apt update
sudo apt install redis
Pyzor and Razor
Razor and Pyzor (actually a fork of Razor with an open-source backend) are two commonly mentioned public spam databases. They date back to the early 2000s and rely on storing spam message hashes, which makes them theoretically less effective against modern spam techniques like dynamic content and AI-generated spam. However, based on my experience, they both—especially Pyzor—still catch a fair amount of spam and remain relevant.
The APT repository contains Pyzor 1.00, which is sufficient (see changelog here discussing Python 3 compatibility which isn't a concern here). The repository also has the latest Razor version (from 2013! But if it works, why change it?). So we can simply install them via APT.
sudo apt install razor pyzor
Recursive DNS resolver
Rspamd relies heavily on DNS resolving for essential functions like IP lookups, reverse lookups, and blacklist checks. The problem is that most external services providers used by rspamd (e.g. RBLs or Realtime BlackLists) limits the number of requests per DNS server. It is therefore recommended to use your own recursive DNS resolver, for instance unbound, which can be installed with apt:
sudo apt install unbound
Configuration
General principles
Rspamd is structured around multiple modules, each providing different techniques to assess whether an email is spam. Like SpamAssassin, it evaluates messages based on various rules and assigns scores when anything positive or negative is detected.
The default configuration is essentially defined in the following files within /etc/rspamd:
./*.{conf,inc}./modules.d/*.conf
Those files should not be modified. Instead, the configuration should be customized by creating new files within the following subfolder:
./local.dand./overrides.d(see difference here)./lua.local.d(for custom complex rules written in lua)./maps.d(for storing local dynamic maps editable via the Web UI)
Many of the modules are enabled by default. Some need to be configured before working or be explicitly enabled. The documentation isn’t crystal clear about this (e.g the neural networks module is listed as enabled by default in the overview but it is written in bold in the module‘s page that it is *disabled* by default and needs to be explicitely enabled) so one has to carefully read each module’s documentation to find out. Below, I’ll share my take on the major modules that fit my needs and interests. Feel free to read in more details the Modules documentation to find out if you’d like to play around with other modules shipped with rspamd, like the GPT module which leverages ChatGPT to detect spam patterns.
Preliminaries
Integrating rspamd with postfix
As recommended in the docs, we will connect postfix to rspamd using the milter protocol. Moreover, we will do other things:
- as our self-hosted mail server is a small instance, we do not need the benefits of a dedicated scan layer provided by the full "proxy mode" (load balancing, compression, etc.), so we will set up rspamd in self-scan mode and disable the unnecessary normal worker.
- as we're running everything locally, we will avoid the overhead of TCP connections and bind rspamd proxy to a UNIX socket (although again, as we have a small instance, this does not have a huge impact). As I run postfix chrooted, we have to put that socket within the chroot jail.
On rspamd's side, after preparing room for the rspamd proxy socket as follows ...
cd /var/spool/postfix/run
sudo mkdir rspamd
sudo chown _rspamd:_rspamd rspamd
... all of the above is done by customizing the normal and proxy worker configurations.
upstream "local" {
  self_scan = yes;
}

bind_socket = "/var/spool/postfix/run/rspamd/rspamd-proxy.sock mode=0660"
/etc/rspamd/local.d/worker-proxy.inc
enabled = false;/etc/rspamd/local.d/worker-normal.inc
On postfix's side, we configure the milter parameters:
## Customized milter settings
milter_default_action = accept
smtpd_milters = unix:/run/rspamd/rspamd-proxy.sock unix:/run/opendkim/opendkim.sock
milter_protocol = 6
/etc/postfix/main.cf
The integration will be effective once we have restarted both services.
Configuring redis
We’ll choose to make redis run on a Unix socket instead of listening to a tcp port as we’re just running locally. Also, we‘re going to set a reasonable memory allocation.
# Look for the following parameters
port 0
maxmemory 500mb
# Uncomment and define the following
unixsocket /run/var/redis.sock
unixsocketperm 770
/etc/redis/redis.conf
We then need to restart redis: sudo systemctl restart redis-server
On rspamd's side, we need to indicate the socket path to the redis module:
servers = "/run/var/redis.sock"/etc/rspamd/local.d/redis.conf
Configuring unbound
Contrary to what the rspamd docs The Rspamd documentation on Unbound didn't work for me out of the box. Instead, I followed Pi-hole's guide to set up unbound with a few modifications:
- The
dns-root-datapackage was already installed on my server, so I didn’t need to manually install the root hints file. - I removed local IP ranges since my mail server doesn’t have other local network devices.
- I added a parameter recommended by Spamhaus
- I used the default port 53, keeping both IPv4 and IPv6 enabled.
The resulting /etc/unbound/unbound.conf.d/server.conf file that I added is the following:
server:
    interface: 127.0.0.1
    interface: ::1
    access-control: 127.0.0.0/8 allow
    access-control: ::1/128 allow

    # From Spamhaus Documentation
    # https://docs.spamhaus.com/datasets/docs/source/40-real-world-usage/Dns/040-Unbound.html
    qname-minimisation: no

    # From PiHole Documentation
    #  https://docs.pi-hole.net/guides/dns/unbound/
    verbosity: 1
    do-ip4: yes
    do-udp: yes
    do-tcp: yes

    # May be set to yes if you have IPv6 connectivity
    do-ip6: yes

    # You want to leave this to no unless you have *native* IPv6. With 6to4 and
    # Terredo tunnels your web browser should favor IPv4 for the same reasons
    prefer-ip6: no

    # Use this only when you downloaded the list of primary root servers!
    # If you use the default dns-root-data package, unbound will find it automatically
    #root-hints: "/var/lib/unbound/root.hints"

    # Trust glue only if it is within the server's authority
    harden-glue: yes

    # Require DNSSEC data for trust-anchored zones, if such data is absent, the zone becomes BOGUS
    harden-dnssec-stripped: yes

    # Don't use Capitalization randomization as it known to cause DNSSEC issues sometimes
    # see https://discourse.pi-hole.net/t/unbound-stubby-or-dnscrypt-proxy/9378 for further details
    use-caps-for-id: no

    # Reduce EDNS reassembly buffer size.
    # IP fragmentation is unreliable on the Internet today, and can cause
    # transmission failures when large DNS messages are sent via UDP. Even
    # when fragmentation does work, it may not be secure; it is theoretically
    # possible to spoof parts of a fragmented DNS message, without easy
    # detection at the receiving end. Recently, there was an excellent study
    # >>> Defragmenting DNS - Determining the optimal maximum UDP response size for DNS <<<
    # by Axel Koolhaas, and Tjeerd Slokker (https://indico.dns-oarc.net/event/36/contributions/776/)
    # in collaboration with NLnet Labs explored DNS using real world data from the
    # the RIPE Atlas probes and the researchers suggested different values for
    # IPv4 and IPv6 and in different scenarios. They advise that servers should
    # be configured to limit DNS messages sent over UDP to a size that will not
    # trigger fragmentation on typical network links. DNS servers can switch
    # from UDP to TCP when a DNS response is too big to fit in this limited
    # buffer size. This value has also been suggested in DNS Flag Day 2020.
    edns-buffer-size: 1232

    # Perform prefetching of close to expired message cache entries
    # This only applies to domains that have been frequently queried
    prefetch: yes

    # One thread should be sufficient, can be increased on beefy machines. In reality for most users running on small networks or on a single machine, it should be unnecessary to seek performance enhancement by increasing num-threads above 1.
    num-threads: 1

    # Ensure kernel buffer is large enough to not lose messages in traffic spikes
    so-rcvbuf: 1m
/etc/unbound/unbound.conf.d/server.conf
Next, I configured my system to use localhost as the DNS server via systemd-resolved by editing /etc/systemd/resolved.conf.
[Resolve]
DNS=127.0.0.1 ::1
FallbackDNS=
#Domains=
#DNSSEC=no
#DNSOverTLS=no
#MulticastDNS=no
#LLMNR=no
#Cache=no-negative
#CacheFromLocalhost=no
DNSStubListener=no
#DNSStubListenerExtra=
#ReadEtcHosts=yes
#ResolveUnicastSingleLabel=no
#StaleRetentionSec=0
/etc/systemd/resolved.conf
The DNSStubListener=no is important so that systemd-resolved does not listen to port 53 and conflicts with unbound.
After these modifications, restart the unbound and systemd-resolved services (sudo systemctl restart <service>)
Connecting to razor and pyzor
Once both packages are installed, configuring them for Rspamd is straightforward and explained on this page in the rspamd's docs. Rspamd categorizes them as External Services, so we just need to create/etc/rspamd/local.d/external_services.conf with the following content:
pyzor {
  # default pyzor settings
  servers = "127.0.0.1:5953"
}

razor {
  # default razor settings
  servers = "127.0.0.1:11342"
}
The above-mentioned ports are used to expose pyzor and razor to rspamd through systemd sockets:
- create the systemd socket and service files (see content respectively here for pyzor, and here for razor – the only way I deviated from the docs was to place those files in
/etc/systemd/systeminstead of/usr/lib/systemd/systemas they are not shipped by the package maintainers) - reload systemd:
sudo systemctl daemon-reload - enable and start the sockets:
sudo systemctl enable pyzor.socket && sudo systemtl start pyzor.socket && sudo systemctl enable razor.socket && sudo systemctl start razor.socket - create the .pyzor home directory as suggested, just in case:
sudo mkdir /var/lib/rspamd/.pyzor && sudo chown _rspamd:_rspamd /var/lib/rspamd/.pyzor
Additionally, we must set scores for their detection results; otherwise, positive matches will have a zero score. This is done in/etc/rspamd/local.d/external_services_group.conf:
symbols = {
  PYZOR {
    # The base score for a spam mail
    weight = 7.0;
    description = "Detected as spam by Pyzor";
  }
  RAZOR {
    weight = 7.0;
    description = "Detected as spam by Vipul's Razor";
  }
}
The weight will be multiplied by the ratio of (reported - whitelisted) / (reported + whitelisted) in pyzor/razor to determine the score

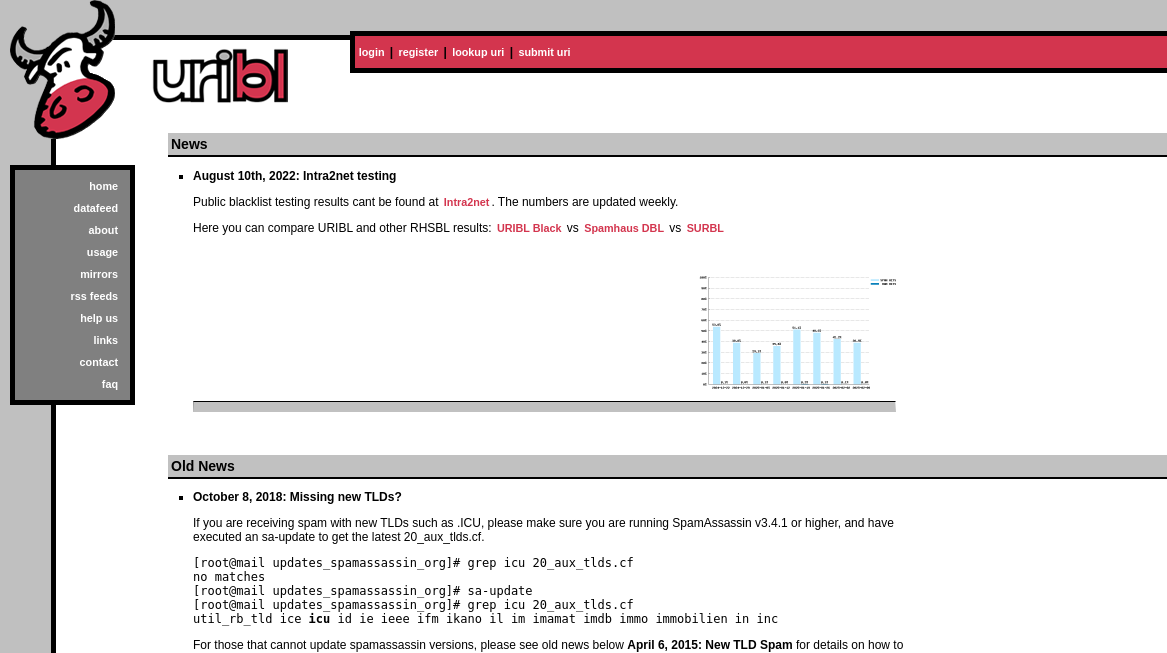
There's many Realtime Blacklists available, most with a Freemium model
Adding extra RBLs (Realtime BlackLists)
As rspamd's doc says:
By default, Rspamd comes with a set of RBL rules pre-configured for popular resources that are often free for non-profit usage, subject to fair usage policies. If you require a different level of support or access, please contact the relevant vendors.
For example, you can use Abusix Mail Intelligence or Spamhaus DQS or any other RBL provider that suits your needs.
Let's see how to install them both. In my experience, Abusix has been a good addition, as it’s the only RBL frequently returning positives. Spamhaus, on the other hand, has been disappointingly quiet.
Abusix
- Create an account on https://app.abusix.com
- Copy the content of the files listed in the page listed above into the corresponding files within
/etc/rspamd/local.d.
/etc/rspamd/lua.local.d e.g. abusix.lua instead of /etc/rspamd/rspamd.local.lua as suggested.Spamhaus DQS
The Github repository linked above describes the procedure:
- Register as a user on Spamhaus' website and get an API key
- Download
3.x/rbl.confand3.x/rbl_group.confand insert your key - Add their content into the corresponding files within
/etc/rspamd/local.d
Adding custom whitelists and blacklists
Despite using multiple RBLs and Pyzor + Razor, some spam still slips through. For instance, I found that certain Danish emails were flagged by Pyzor but didn’t accumulate a high enough score to be rejected.
To address this, I set up custom whitelists and blacklists using Rspamd’s Multimap module
This post on Github from @Denydias (thanks !) was almost all I needed. To set up blacklists and whitelists for domains, FROM address, IP, or recipient address::
- Create (or add to)
/etc/rspamd/local.d/multimap.confand add the following:
# Blacklists
local_bl_domain {
  type = "from";
  filter = "email:domain";
  map = "$CONFDIR/maps.d/local_bl_domain.inc";
  prefilter = true;
  action = "reject";
  message = "Domain blacklisted due to manually confirmed spam or phishing activity"
  symbol = "LOCAL_BL_DOMAIN";
  description = "Blacklist map for LOCAL_BL_DOMAIN";
}

local_bl_from {
  type = "from";
  map = "$CONFDIR/maps.d/local_bl_from.inc";
  symbol = "LOCAL_BL_FROM";
  description = "Blacklist map for LOCAL_BL_FROM";
  score = 10;
}
local_bl_ip {
  type = "ip";
  map = "$CONFDIR/maps.d/local_bl_ip.inc";
  symbol = "LOCAL_BL_IP";
  description = "Blacklist map for LOCAL_BL_IP";
  score = 10;
}
local_bl_rcpt {
  type = "rcpt";
  map = "$CONFDIR/maps.d/local_bl_rcpt.inc";
  symbol = "LOCAL_BL_RCPT";
  description = "Blacklist map for LOCAL_BL_RCPT";
  score = 10;
}

# Whitelists
local_wl_domain {
  type = "from";
  filter = "email:domain:tld";
  map = "$CONFDIR/maps.d/local_wl_domain.inc";
  symbol = "LOCAL_WL_DOMAIN";
  description = "Whitelist map for LOCAL_WL_DOMAIN";
  score = -10;
}
local_wl_from {
  type = "from";
  map = "$CONFDIR/maps.d/local_wl_from.inc";
  symbol = "LOCAL_WL_FROM";
  description = "Whitelist map for LOCAL_WL_FROM";
  score = -10;
}
local_wl_ip {
  type = "ip";
  map = "$CONFDIR/maps.d/local_wl_ip.inc";
  symbol = "LOCAL_WL_IP";
  description = "Whitelist map for LOCAL_WL_IP";
  score = -10;
}
local_wl_rcpt {
  type = "rcpt";
  map = "$CONFDIR/maps.d/local_wl_rcpt.inc";
  symbol = "LOCAL_WL_RCPT";
  description = "Whitelist map for LOCAL_WL_RCPT";
  score = -5;
}- Create the map files:
cd /etc/rspamd/maps.d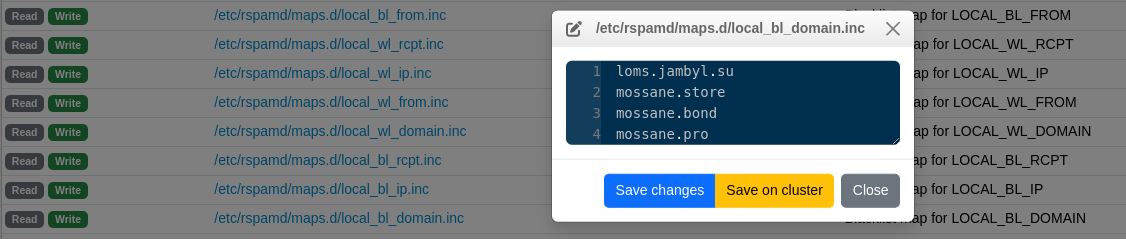
sudo touch local_bl_domain.inc local_bl_from.inc local_bl_ip.inc local_bl_rcpt.inc local_wl_domain.inc local_wl_from.inc local_wl_rcpt.inc- rspamd's user (_rspamd) needs rw rights on the files and the directory itself in order to be able to edit the maps from the WebUI:
sudo chown -R _rspamd:_rspamd /etc/rspamd/maps.dRestart rspamd and you're good to go, with lists editable on the WebUI.
Detecting phishing
Rspamd automatically checks whether domains in the href (and their redirections because they can be "legit" tracking links) and text part of links correspond. Otherwise it flags this as a phishing attempt (symbol "PHISHING" with a score of 2 by default).
by using external sources
Additionally, Rspamd can check against "realtime" publicly available phishing database whether the actual site we are led to is a phishing website:
- By default, support for Phishtank is enabled by default.
- Support for Openphish is also built-in and can be enabled manually. However the URL written in the default module and in rspamd's docs does not work because it's a redirection to a file actually stored on Github and rspamd does not support http redirection according to this post (retrieved Feb 2025). Using the direct GitHub URL fixes this issue.
- Support for a so-called "Generic feed" can be added too: the docs takes CaUMA as an example but I was lazy to figure out how to use their API and download the file that I search on Github and opted for another one, Phishing.Database, which seem to be updated regularly.
The resulting /etc/rspamd/local.d/phishing.conf file is the following:
# Enable openphish support (default disabled)
openphish_enabled = true;
# URL of feed, default is public url:
openphish_map = "https://raw.githubusercontent.com/openphish/public_feed/refs/heads/main/feed.txt";
# For premium feed, change that to your personal URL, e.g.
# openphish_map = "https://openphish.com/samples/premium_feed.json";
# Change this to true if premium feed is enabled
openphish_premium = false;

generic_service_enabled = true;
generic_service_name = 'Phishing.Database';
generic_service_symbol = "PHISHING_DATABASE";
generic_service_map = "https://phish.co.za/latest/phishing-links-ACTIVE.txt";
For the generic feed, we need to set up the score corresponding to the symbol we've just defined. So we can put the following in /etc/rspamd/local.d/phishing_group.conf:
symbols {
    "PHISHING_DATABASE" {
        weight = 5.0;
        description = "Phishing URL listed in Phishing.Database";
        one_shot = true;
    }
}
by comparing Display Name and From Address
In additional to the above, which has had limited detection rate in my case, I decided to implement a very simple thing: comparing whether the Display Name and From: address correspond. This is to capture very common but annoying things like an email everyone tend to receive from e.g. MyBank Customer Service <somejibberish@obviouslynotmybank.tld>. This is rather manual and an alternative could be to use the Local Blacklists (e.g. local_bl_domain) but I thought it may be handy.
I called this technique "impersonation", I could have found a nicer name, but it has the advantage of exploring another set of rspamd rules: custom lua scripts.
- Create
/etc/rspamd/lua.local.d/impersonation.luawith the following script:
local rspamd_logger = require "rspamd_logger"
local rspamd_regexp = require "rspamd_regexp"

local MAP_FILE_PATH = "/etc/rspamd/maps.d/impersonations.inc"

-- Create an empty table to store impersonation patterns
local impersonation_patterns = {}

-- Define the map using rspamd_config:add_map
local function load_impersonation_patterns()
    rspamd_config:add_map({
        type = "callback",
        description = "Impersonation detection map",
        url = "file://" .. MAP_FILE_PATH,
        callback = function(map)
            if not map then
                rspamd_logger.errx("Failed to load map file: %s", MAP_FILE_PATH)
                return
            end
            local new_patterns = {}
  	    local count = 0
            for line in string.gmatch(map, "[^\r\n]+") do
                 local display_name, email_pattern = line:match("^(%S+) (%S+)$")
                if display_name and email_pattern then
                    local display_re = rspamd_regexp.create_cached(display_name)
                    local email_re = rspamd_regexp.create_cached(email_pattern)
                    if display_re and email_re then
                        table.insert(new_patterns, {display = display_re, email = email_re})
                    else
                        rspamd_logger.errx("Invalid regex in map file: %s", line)
                    end
                else
                    rspamd_logger.errx("Invalid format in map file: %s", line)
                end
		count = count + 1
            end
            impersonation_patterns = new_patterns
            rspamd_logger.infox("Loaded %1 impersonation patterns: %2", count, impersonation_patterns)
        end
    })
end

local function check_impersonation(task)
    local from = task:get_from(2) -- "From" header as parsed by Rspamd (MIME header)
    if not from or #from == 0 then return end

    local from_name = from[1].name or ""
    local from_addr = from[1].addr or ""

    rspamd_logger.infox("Checking impersonation: Display='%s', Email='%s'", from_name, from_addr)

    for _, pattern in ipairs(impersonation_patterns) do
        if pattern.display:match(from_name) then
            if not pattern.email:match(from_addr) then
                rspamd_logger.infox("Detected impersonation with pattern: Display '%s' and email '%s'", pattern.display, pattern.email)
                task:insert_result("PHISHING_IMPERSONATION", 1.0, from_name, from_addr)
                return
            end
        end
    end
end

-- Register the symbol
rspamd_config:register_symbol({
    name = "PHISHING_IMPERSONATION",
    type = "callback",
    callback = check_impersonation,
})

-- Load impersonation patterns on startup
load_impersonation_patterns()
- Create the map file (don't forget to transfer ownership to _rspamd) and populate some regexp pairs (
<display name regexp> <expected address regexp>)
# /etc/rspamd/maps.d/impersonations.inc
/.*punktum.*/i /.*@punktum\.dk$/
Spam messages stealing the identity of the Danish hostmaster Punktum.dk was what triggered me to create this rule in the first place (see: https://punktum.dk/en/fraud)
- Define the score in a new or existing group
group "tmlmt" {
  symbols = {
    "PHISHING_IMPERSONATION" {
      score = 10.0;
      description = "Detects impersonation attempts using display name vs. email mismatches";
    }
  }
}
/etc/rspamd/local.d/groups.conf

Automatically moving spam messages to the Junk folder
This is done by Dovecot's Sieve plugin. Each Dovecot installation can be unique as we each have our preferences and specific circumstances, but in my case, the setup is as follows with a recent fresh install of Dovecot on Ubuntu 24.04 and editing the default configuration files shipped with the package (/etc/dovecot/conf.d).
- Sieve plugin enabled in the Dovecot LMTP Server:
protocol lmtp {
  ...
  mail_plugins = $mail_plugins sieve
  ...
}
/etc/dovecot/conf.d/20-lmtp.conf
- Default moving of all spams into the spam folder
plugin {
  ...
  sieve_before = /etc/dovecot/sieve/sieve_before.sieve
  ...
}
/etc/dovecot/conf.d/90-sieve.conf
I use the sieve_before config parameter instead of sieve_default, so that the sieve script is run for all users before running any user's personal sieve script and to prevent the default sieve file from being skipped if such user script exists.
I simply want to use the presence of the X-Spam: Yes header added by rspamd when it classifies a message as spam, as the trigger for moving the email into the Junk folder:
require "fileinto";
if header :contains "X-Spam-Flag" "YES" {
    fileinto "Junk";
}
if header :is "X-Spam" "Yes" {
    fileinto "Junk";
}
/etc/dovecot/sieve/default.sieve
Note: the sieve script, if places within /etc must be converted manually into a binary file otherwise Dovecot will face a permission error even if the /etc/dovecot/sieve folder is owned by the dovecot user (see explanation here): sudo sievec /etc/dovecot/sieve/sieve_before.sieve
Autolearning spam and ham
by defining thresholds for the Bayes classifier
Rspamd determines whether a message is spam or ham using Bayesian probability, tokenizing messages (essentially splitting them into words) and analyzing statistical patterns. Autolearning can be configured by adding one of the following options in /etc/rspamd/local.d/classifier_bayes.conf:
autolearn = true: autolearning is performing as spam if a message has reject action and as ham if a message has negative score
autolearn = [-5, 5]: autolearn as ham if the score is less than -5 and as spam if the score is more than 5
autolearn = "return function(task) ... end": use the following Lua function to detect if autolearn is needed (function should return ‘ham’ if learn as ham is needed and string ‘spam’ if learn as spam is needed, if no learning is needed then a function can return anything including nil)
autolearn {
    spam_threshold = 6.0; # When to learn spam (score >= threshold and action is reject)
    junk_threshold = 4.0; # When to learn spam (score >= threshold and action is rewrite subject or add header, and has two or more positive results)
    ham_threshold = -0.5; # When to learn ham (score <= threshold and action is no action, and score is negative or has three or more negative results)
    check_balance = true; # Check spam and ham balance
    min_balance = 0.9; # Keep diff for spam/ham learns for at least this value
}
/etc/rspamd/local.d/classifier_bayes.conf
Additionally, classification can be done per user by adding per_user = true or per domain by adding a small lua script as per the docs. I opted for the following approach:
autolearn {
    spam_threshold = 6.0; # When to learn spam (score >= threshold and action is reject)
    junk_threshold = 4.0; # When to learn spam (score >= threshold and action is rewrite subject or add header, and has two or more positive results)
    ham_threshold = -0.5; # When to learn ham (score <= threshold and action is no action, and score is negative or has three or more negative results)
    check_balance = true; # Check spam and ham balance
    min_balance = 0.9; # Keep diff for spam/ham learns for at least this value
}
per_user = true
/etc/rspamd/local.d/classifier_bayes.conf
by triggering learning when moving an email to the Junk folder
Rspamd’s built-in autolearn function runs when an email is received, not when we manually move a missed spam message to the Junk folder. In order to enable this, we can use Dovecot's IMAPSieve plugin. Dovecot's docs contain some example instructions worth reading, including a section for rspamd. The latter also refers to an alternative made available by @Darix on Github (darix/dovecot-sieve-antispam-rspamd). Thank you both for the inspiration ! In the same Dovecot setup as above, here are the extra settings that I put in place:
- IMAPSieve plugin enabled for IMAP:
protocol imap {
  ...
  mail_plugins = $mail_plugins imap_sieve
  ...
}
/etc/dovecot/conf.d/20-imap.conf
- imapsieve extension enabled for Sieve:
plugin {
  ...
  sieve_plugins = sieve_imapsieve sieve_extprograms
  ...
}
/etc/dovecot/conf.d/90-sieve.conf
- Default location of pipe scripts uncommended in the corresponding config file:
plugin {
  ...
  sieve_pipe_bin_dir = /usr/lib/dovecot/sieve-pipe
  ...
}
/etc/dovecot/conf.d/90-sieve-extprograms.conf
- Using the plugin to define the triggers for the learning sieve scripts:
plugin {
  # From elsewhere to Junk folder
  imapsieve_mailbox1_name = Junk
  imapsieve_mailbox1_causes = COPY
  imapsieve_mailbox1_before = file:/etc/dovecot/sieve/learn-and-report-spam.sieve

  # From Junk folder to elsewhere
  imapsieve_mailbox2_name = *
  imapsieve_mailbox2_from = Junk
  imapsieve_mailbox2_causes = COPY
  imapsieve_mailbox2_before = file:/etc/dovecot/sieve/learn-ham.sieve
}
/etc/dovecot/conf.d/99-imapsieve.conf
- Sieve scripts very simply defined as below and pre-compiled with sievec
require ["vnd.dovecot.pipe", "copy", "imapsieve", "imap4flags"];

addflag "\\Seen";
pipe :copy "learn-and-report-spam.sh";
/etc/dovecot/sieve/learn-and-report-spam.sieve
require ["vnd.dovecot.pipe", "copy", "imapsieve", "environment", "variables"];

if environment :matches "imap.mailbox" "*" {
  set "mailbox" "${1}";
}

if string "${mailbox}" "Trash" {
  stop;
}

pipe :copy "learn-ham.sh";
/etc/dovecot/sieve/learn-ham.sieve
Then run: sudo sievec /etc/dovecot/sieve
- Piped shell scripts defined as follows:
#!/bin/bash

# get "imap.user" (from sieve environment), also available as $USER
deliver_to=$USER

# defaults
RSPAMD_CONTROLLER_PASSWORD=
RSPAMD_CONTROLLER_HOST="localhost"

# loading and checking config
source "/etc/dovecot/rspamd-controller.conf"

if [ -z "${RSPAMD_CONTROLLER_HOST}" ] ; then
	logger -p mail.err "Missing host name or ip for rspamd"
	exit 1
fi

if [ -z "${RSPAMD_CONTROLLER_PASSWORD}" ] ; then
	logger -p mail.debug "Rspamd controller password is an empty string (insecure)"
fi

# Make rspamd learn spam and report spam to pyzor
tee >(/usr/bin/rspamc -h "${RSPAMD_CONTROLLER_HOST}" -P "${RSPAMD_CONTROLLER_PASSWORD}" -d "${deliver_to}" learn_spam) \
| /usr/bin/pyzor report
/usr/lib/dovecot/sieve-pipe/learn-and-report-spam.sh
#!/bin/bash

# get "imap.user" (from sieve environment), also available as $USER
deliver_to=$USER

# defaults
RSPAMD_CONTROLLER_PASSWORD=
RSPAMD_CONTROLLER_HOST="localhost"

# loading and checking config
source "/etc/dovecot/rspamd-controller.conf"

if [ -z "${RSPAMD_CONTROLLER_HOST}" ] ; then
	logger -p mail.err "Missing host name or ip for rspamd"
	exit 1
fi

if [ -z "${RSPAMD_CONTROLLER_PASSWORD}" ] ; then
	logger -p mail.debug "Rspamd controller password is an empty string (insecure)"
fi

# Make rspamd learn spam
exec /usr/bin/rspamc -h "${RSPAMD_CONTROLLER_HOST}" -P "${RSPAMD_CONTROLLER_PASSWORD}" -d "${deliver_to}" learn_ham
/usr/lib/dovecot/sieve-pipe/learn-ham.sh
- Rspamd controller host and password (same as Web UI) defined in their own config file:
RSPAMD_CONTROLLER_PASSWORD="<password>"
RSPAMD_CONTROLLER_HOST="localhost"
/etc/dovecot/rspamd-controller.conf
Fine-tuning
Adjusting scores
Follow the instructions in rspamd's quickstart guide. After analyzing a few dozen emails, you might want to adjust individual scores (e.g., the PYZOR symbol when Pyzor flags a message as spam) or modify actions (e.g., the score threshold at which Rspamd greylists, modifies headers, or outright rejects emails).
Defining thresholds for actions
This can be configured through the Web UI under the Configuration tab or manually in/etc/rspamd/local.d/actions.conf:
reject = 12; # Reject when reaching this score
add_header = 6; # Add header when reaching this score
greylist = 4; # Apply greylisting when reaching this score (will emit `soft reject action`)

#unknown_weight = 1.0; # Enable if need to set score for all symbols implicitly
# Each new symbol is added multiplied by gf^N, where N is the number of spammy symbols
#grow_factor = 1.1;
# Set rewrite subject to this value (%s is replaced by the original subject)
#subject = "***SPAM*** %s"
/etc/rspamd/local.d/actions.conf

I find that the effect of greylisting on spam is quite limited. Spammers (or their bots) tend to retry sending messages, making this measure less effective.
Quieting DKIM Signing attempts
Since I handle DKIM signing separately with OpenDKIM and Postfix, I didn’t need Rspamd to take over this task. However, I noticed log warnings due to a fallback feature enabled by default. To suppress these, I disabled the fallback mechanism:
try_fallback = false;/etc/rspamd/local.d/dkim_signing.conf
Two nice extras
Logging
When fine-tuning your configuration, enabling debug logging can be very helpful. The debug_modules option in logging.inc allows you to get detailed insights into how Rspamd is processing emails.
# /etc/rspamd/local.d/logging.inc
debug_modules = ["rbl", "phishing"];
The rspamd log file (/var/log/rspamd/rspamd.log) will contain debug logging of the rbl and phishing modules
Adding rspamd headers to all emails
If you’d like to see Rspamd's detailed headers (e.g., scoring breakdown) in all emails, add this to /etc/rspamd/milter_headers.conf:
extended_spam_headers = true;
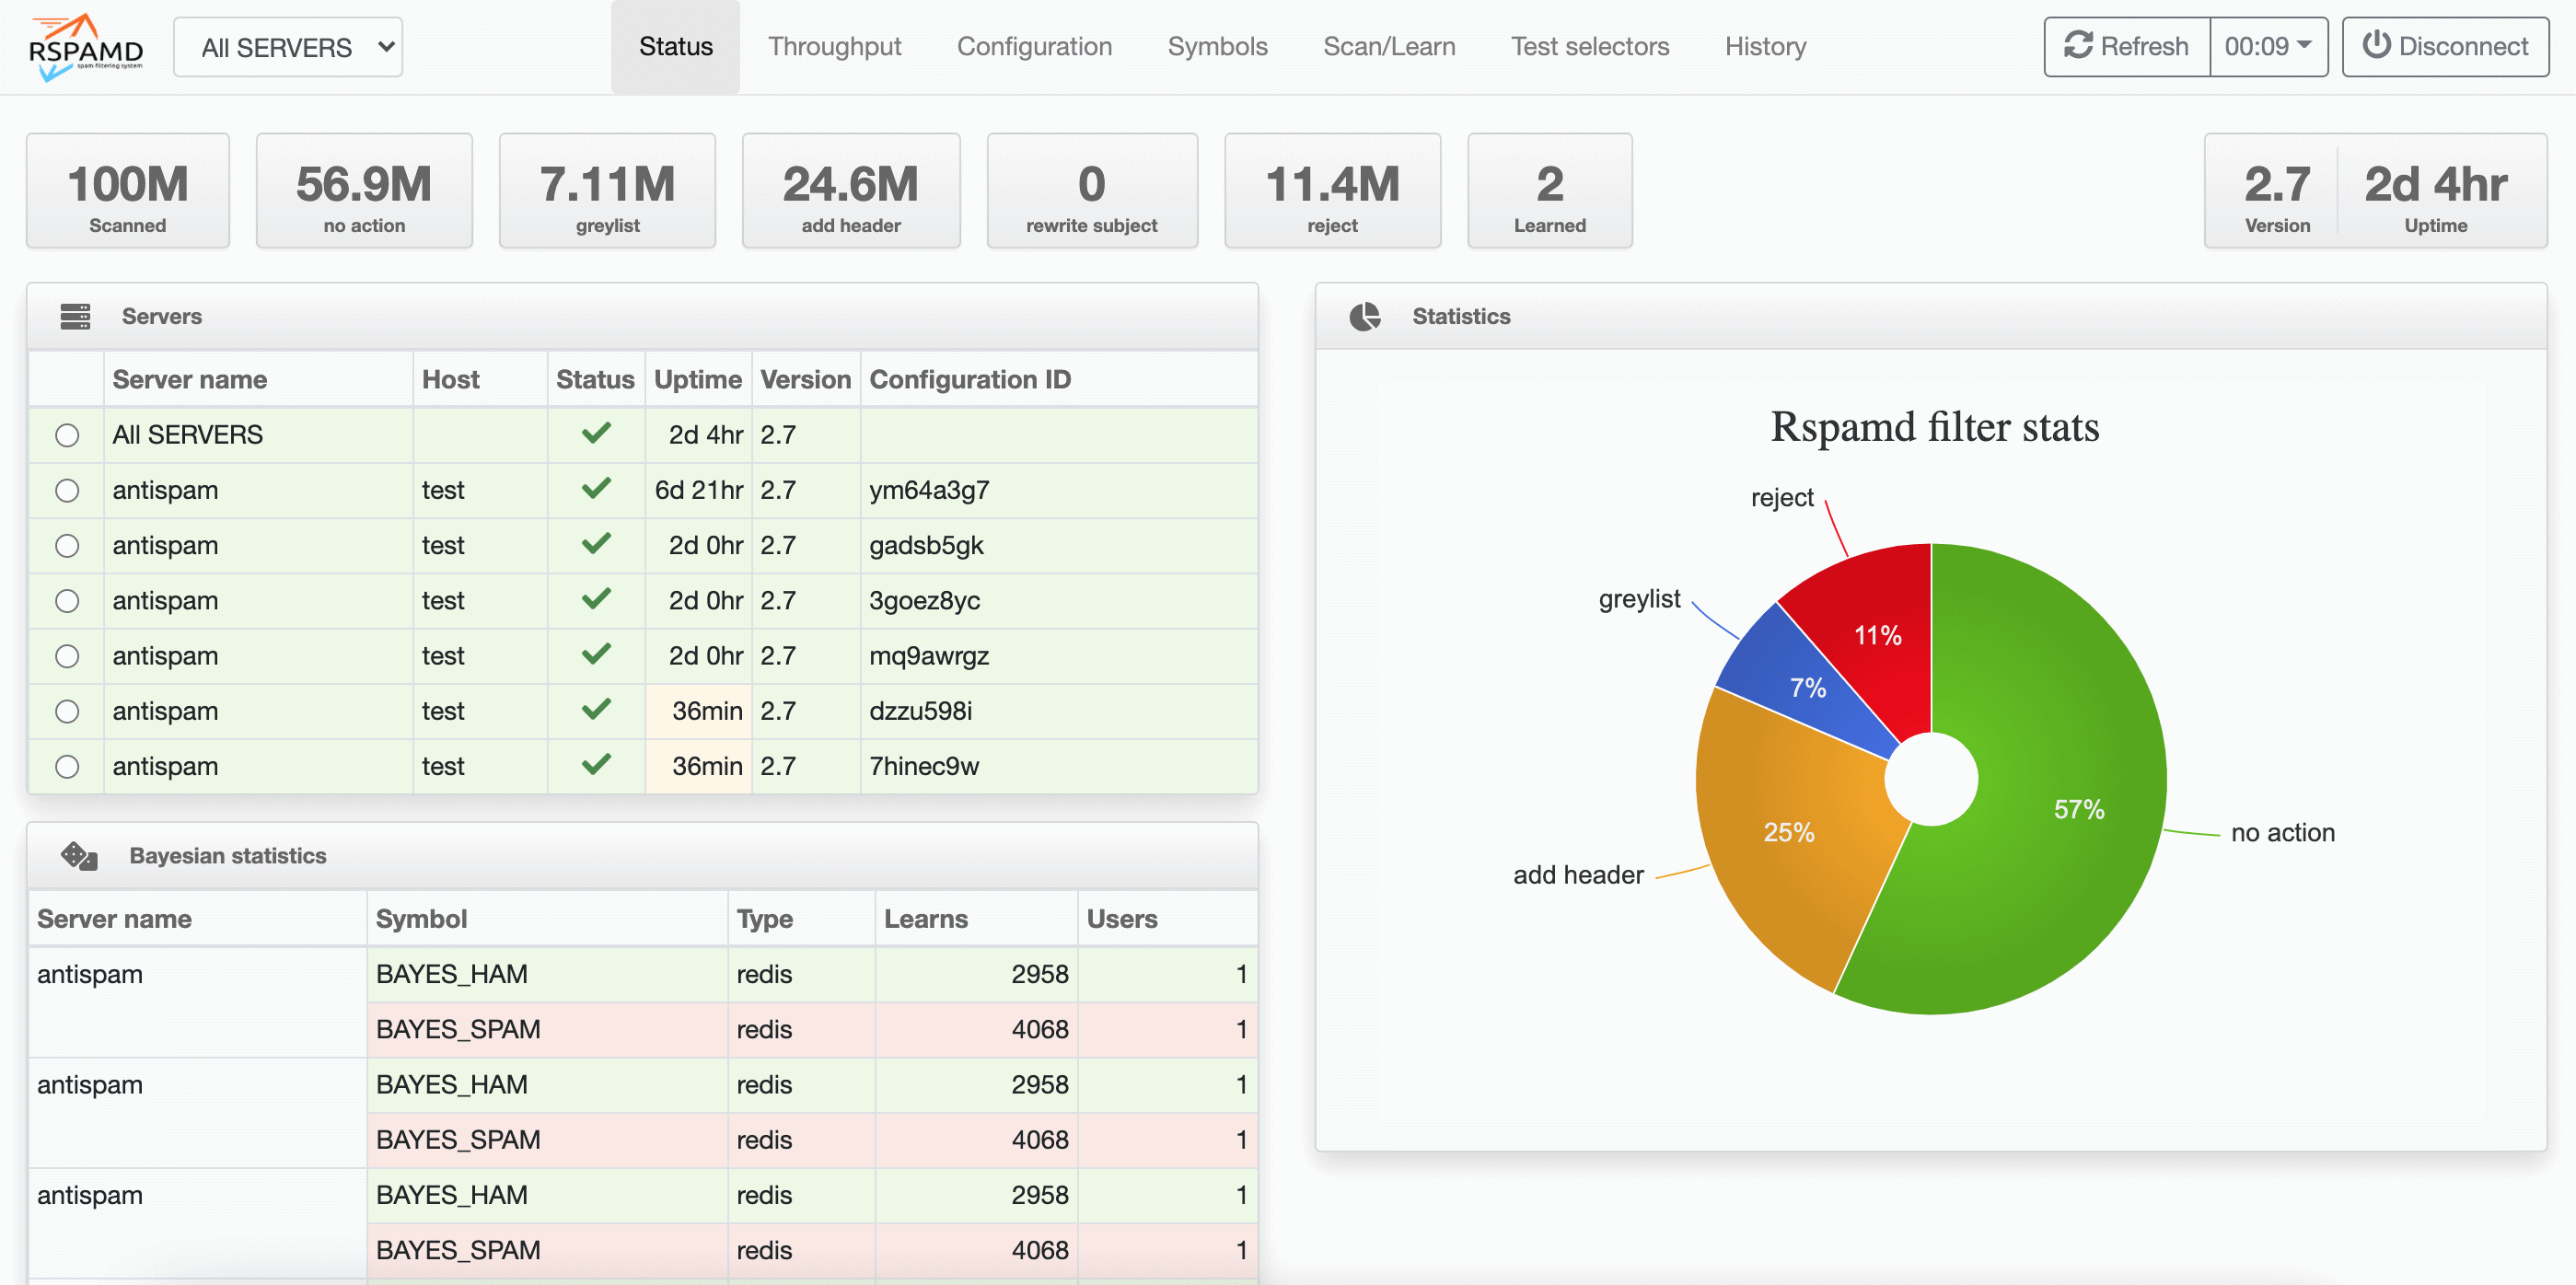
Web UI
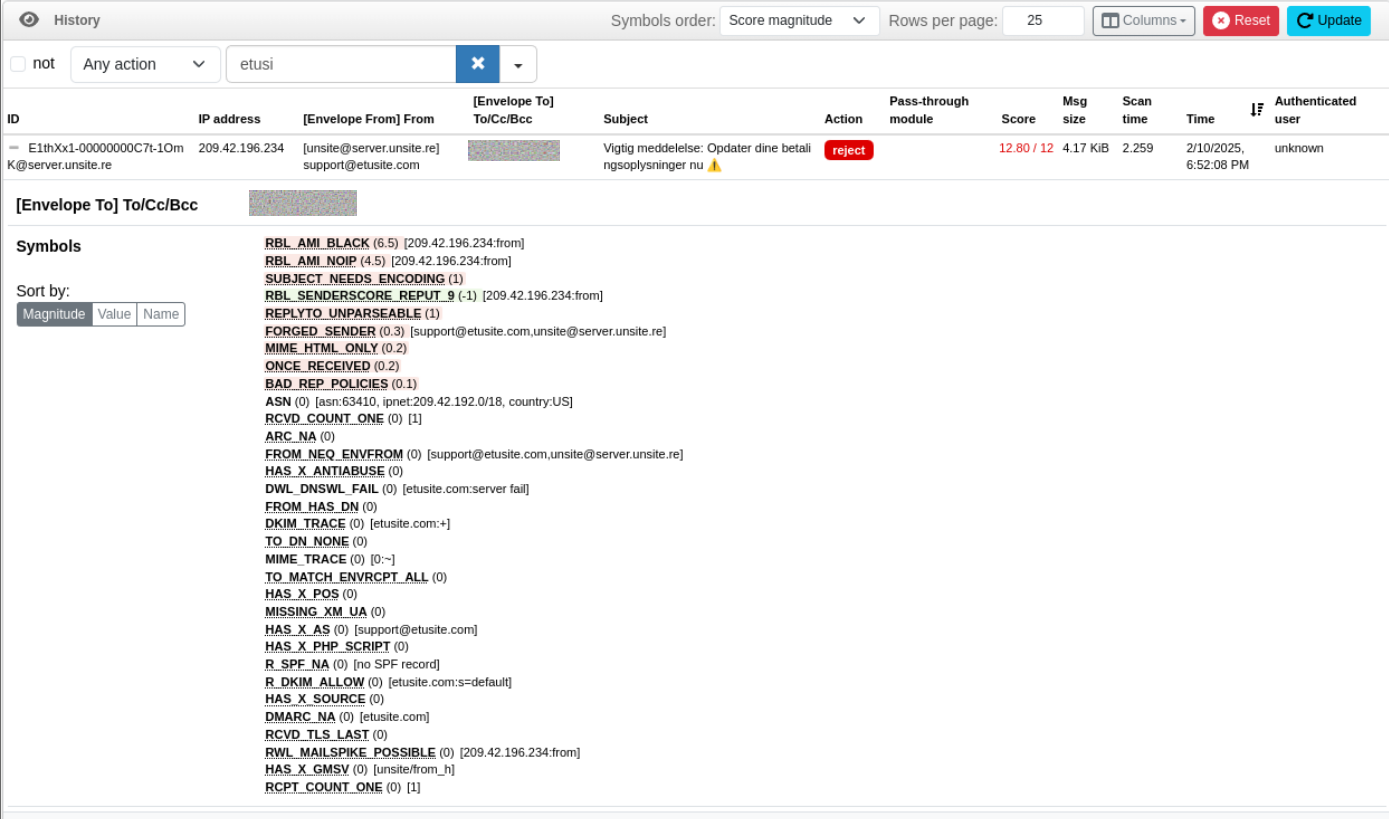
Rspamd ships with a really great web interface that makes it easy to monitor email processing, view statistics, and modify key configuration settings like dynamic maps and scoring.
If you want to make it accessible online, you can use the web server of your choice (e.g. nginx) as reverse proxy with an SSL certificate provided by e.g. Let's Encrypt. There's plenty of example configurations available online that you can adapt.
Conclusion
With Rspamd now installed and configured on top of Postfix and Dovecot, we’ve strengthened our self-hosted mail server’s defenses against spam and phishing. Beyond its powerful filtering capabilities, Rspamd offers a sleek and useful web UI, making monitoring and fine-tuning much easier.
From multiple RBL lookups and Bayesian (or neural, or GPT-based!) classification to greylisting, phishing detection, custom rules, whitelists, blacklists, auto-learning, auto-moving, and auto-reporting—Rspamd proves to be a highly flexible and effective solution.
After having looked at rspamd's history for a while, I realize that:
- while they are important to get rid of obvious spam who try to use someone else's domain without authorization, they don't prevent spammers from using their shitty domains and signing their emails to flood people's inbox: most spams pass SPF and DKIM checks.
- quite a few checks are useless, e.g. the symbols RCPT_COUNT_ONE (One recipient) or FROM_HAS_DN (From header has a display name); while some others are inconclusive, e.g. RCVD_COUNT_ONE (One receiver) vs RCVD_COUNT_THREE (Three to five receivers), or TO_DN_NONE (None of the recipients have display names) as you don't necessarily give your name when you sign up for a newsletter for instance.
Fighting spam is not an easy fight as spamming techniques have evolved over time (AI-generated messages, etc.), so it requires a lot of fine-tuning, and staying ahead of the game with new detection methods (e.g. using LLMs) and collaborative databases.
If you have any thoughts, questions, or need clarification, feel free to leave a comment or send me a message!