Create, style and render self-hosted vector maps 🗺
Step-by-step setup of a basic recipe for a web app featuring an interactive map, fully self-hosted including tiles and custom geo-data, and with a customizable style.
Introduction
I wanted to create a web app whose main asset featuring an interactive map, fully self-hosted including tiles and custom geo-data, and with a customizable style. In the following, I will explain in 5 steps how you can reproduce a starting point for something similar on your own server (the below assumes an Ubuntu server).
1. Download OpenStreetMap Extract
For small areas
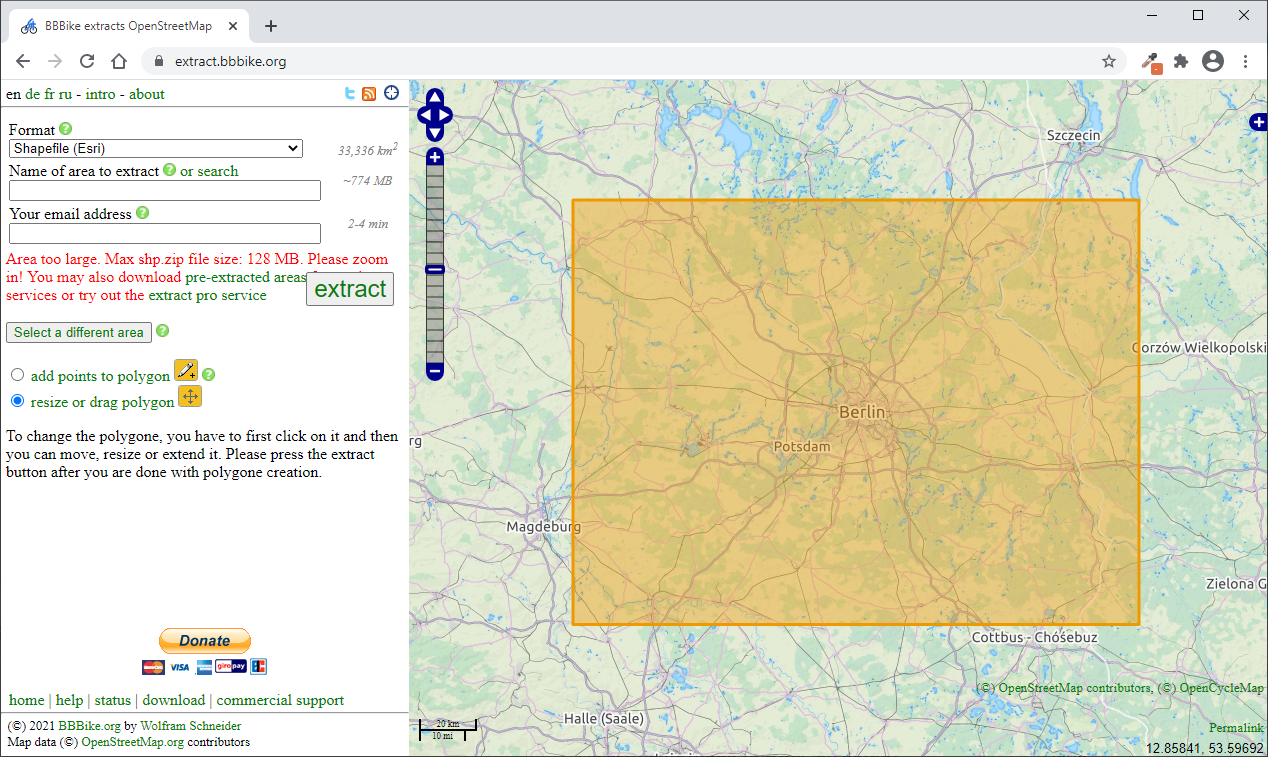
Extract OSM data using https://extract.bbbike.org/. Select PBF as the output format
For bigger areas (countries, etc.)
Geofabrik.de offers daily extracts of OSM for entire sub-regions, countries, or continents
(Optional) Additional static layers
Custom layers can be create in Shapefile format using https://pypi.org/project/pyshp/ (not tested)
2. Create Mapbox tileset
Download and install Tilemaker to create your vector tiles: https://github.com/systemed/tilemaker.
Tilemaker is compiled and installed from the source. There are some dependencies listed in the INSTALL.md file, and that need to be installed.
git clone https://github.com/systemed/tilemaker.git
cd tilemaker

# Install dependencies
sudo apt install build-essential libboost-dev libboost-filesystem-dev libboost-iostreams-dev libboost-program-options-dev libboost-system-dev liblua5.1-0-dev libprotobuf-dev libshp-dev libsqlite3-dev protobuf-compiler rapidjson-dev

# Compile
make

# Install
sudo checkinstall
Note: checkinstall is a useful program which keeps track of files installed with make install. It's installed from the default repo: sudo apt install checkinstall
Tilemaker creates vector tiles (in Mapbox Vector Tile format) from an .osm.pbf file. Tilemaker is configured with:
- A .json file listing each layer, and the zoom levels at which to apply it
- A .lua file tells how each node should be placed it into those layers according to their tags
There are default files in the source folder that can be used. So:
<tilemaker_src_folder>$ tilemaker <osm_extract>.pbf \
--output <name>.mbtiles \
--config resources/config-openmaptiles.json \
--process resources/process-openmaptiles.lua
Note: Shapefiles (.shp) can also be added as described on this page: https://github.com/systemed/tilemaker/blob/master/CONFIGURATION.md. You can use that functionality if you want to add custom layers into your basic tileset.
If you want to include the sea in your tiles, the ability to add shapefiles is actually used by the default json and lua files, as the README of tilemaker explains:
create a directory calledcoastlinein the same place you're running tilemaker from, and then save the files from https://osmdata.openstreetmap.de/download/water-polygons-split-4326.zip in it, such that tilemaker can find a file atcoastline/water_polygons.shp.
3. Create and edit style
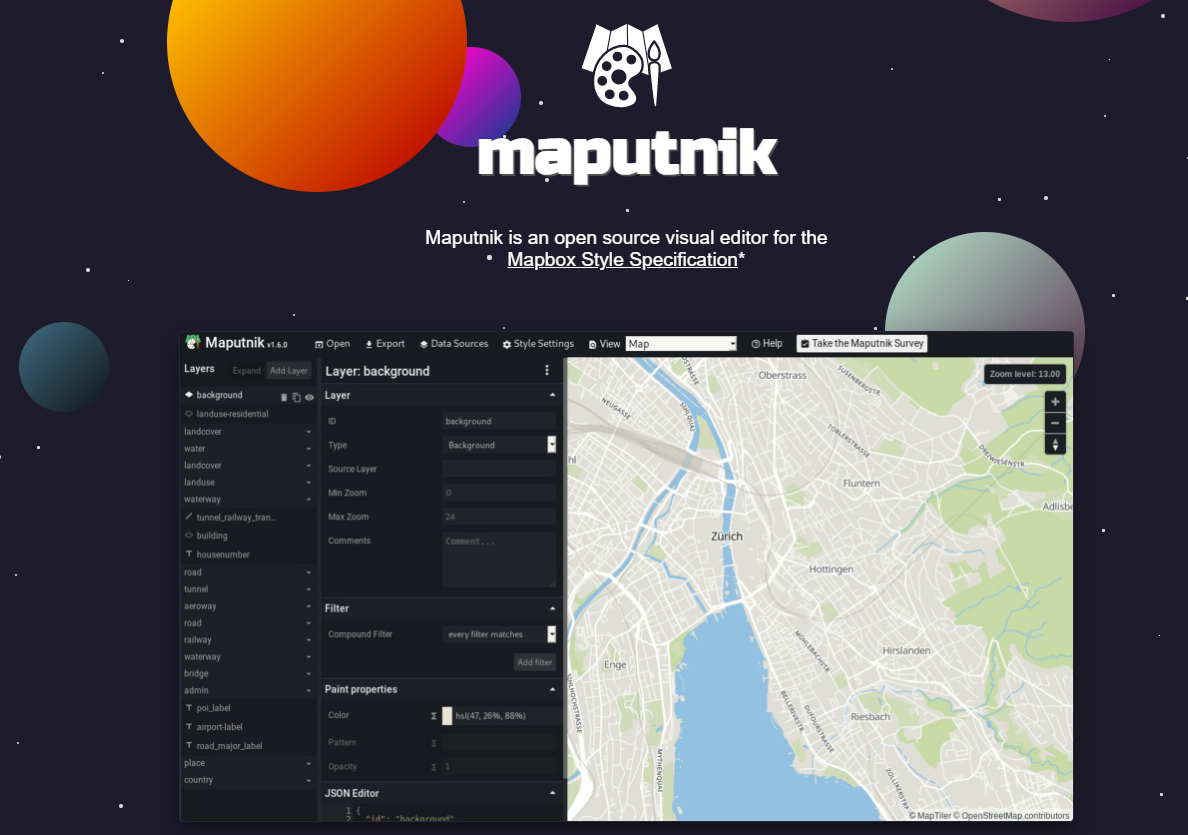
Maputnik is a free and open source visual editor for the Mapbox GL style specification. You can use the online editor if you want to edit your style using the online maptiler tiles as example. Alternatively if you want to train with the tiles served by your local vector tile server, you can download the editor or use docker to run it locally:
sudo docker pull maputnik/editor
docker run -it --rm -p 8888:8888 maputnik/editor
Start by using one of the styles listed on https://openmaptiles.org/styles/. Click on Code on Github, then Code > Download ZIP, and extract the style.json. In Maputnik (http://127.0.0.1:8888), upload the json file. In Data Source, replace the URL by the TileJSON URL you can copy from your TileServer-GL homepage. Now you can start customizing how you want all layers to be displayed.
Once done, you can export a .json style file. In the following paragraph, we'll see which fields we need to modify in order for our style to be used in combination with our own tileset and tileserver.
4. Serve vector tiles

Serve your tiles using TileServer GL https://maptiler-tileserver.readthedocs.io/. OpenMapTiles recommends installing and using it with docker: https://openmaptiles.org/docs/host/tileserver-gl/:
sudo docker pull maptiler/tileserver-gl
sudo docker run --rm -it -v $(pwd):/data -p 8080:8080 maptiler/tileserver-gl
The above should already get your tileserver running and accessible on http://127.0.0.1:8080, serving the tilesets in your current directory. You will be able to inspect them, or see a basic preview with TileServer-GL's default style.
In order to get closer to production, we will need to create a config file, and get a few things in place. In the following, "root folder" will refer to the root folder of our tileserver.
- Download the Noto Sans fonts from https://github.com/klokantech/klokantech-gl-fonts, and copy the files into a new "fonts" folder within the root folder. Rename the folders to remove Klokantech. Don't forget to credit KlokanTech :)
- Create two additional folders in the root folder: "glyphs" and "styles", where you'll move the .json style files you've created in step #3.
- Finally, create a myconfig.json file containing the following:
{
  "options": {
    "paths": {
      "root": "/data",
      "fonts": "fonts",
      "sprites": "sprites",
      "styles": "styles",
      "mbtiles": ""
    },
    "frontPage": true,
    "formatQuality": {
      "jpeg": 80,
      "webp": 90
    },
    "maxScaleFactor": 3,
    "maxSize": 2048,
    "pbfAlias": "pbf",
    "serveAllFonts": false,
    "serveAllStyles": false,
    "serveStaticMaps": true,
    "tileMargin": 0
  },
  "styles": {
    "my-style": {
      "style": "mystyle.json",
      "tilejson": {
        "bounds": [
          10,
          55,
          12,
          60
        ]
      }
    }
  },
  "data": {
    "tileset": {
      "mbtiles": "mytileset.mbtiles"
    }
  }
}
Replacing your tileset and style name accordingly. Bounds are the boundaries of the tileset, long/lat of bottom left and upper right corners.
In your style file, replace the source and glyphs URLs by the following:
"url": "mbtiles://mytiles.mbtiles"
[...]
"glyphs": "{fontstack}/{range}.pbf",
Then, you can run and check that everything works :)
sudo docker run -it -v $(pwd):/data -p 8080:8080 maptiler/tileserver-gl -c myconfig.jsonOnce we think we're good to go, we can change the docker run so that it runs automatically at server boot
sudo docker run -t -d --restart unless-stopped -v $(pwd):/data -p 8080:8080 maptiler/tileserver-gl -c myconfig.json5. Display map
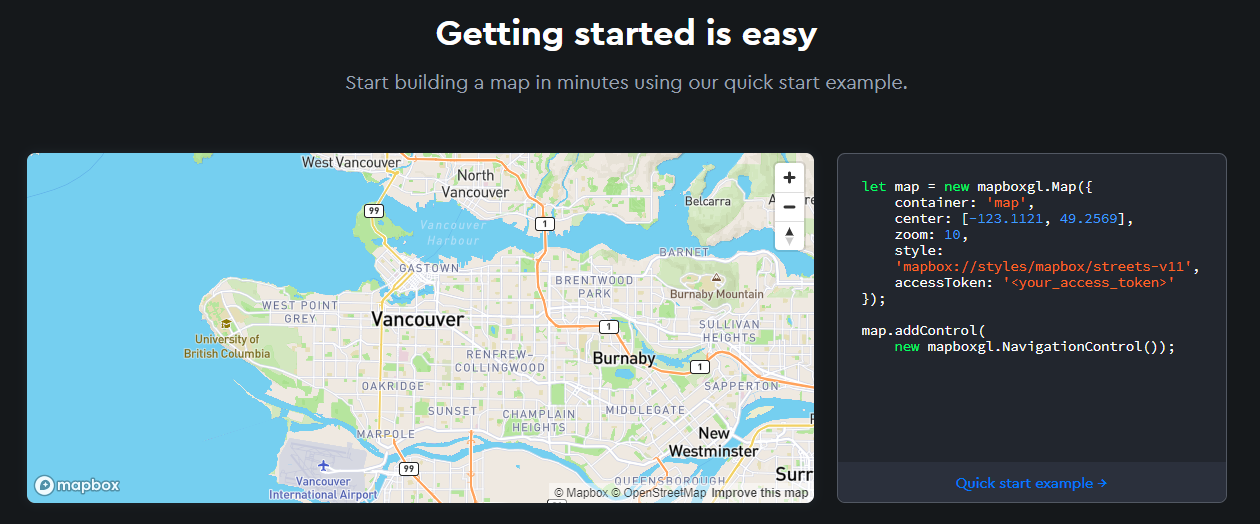
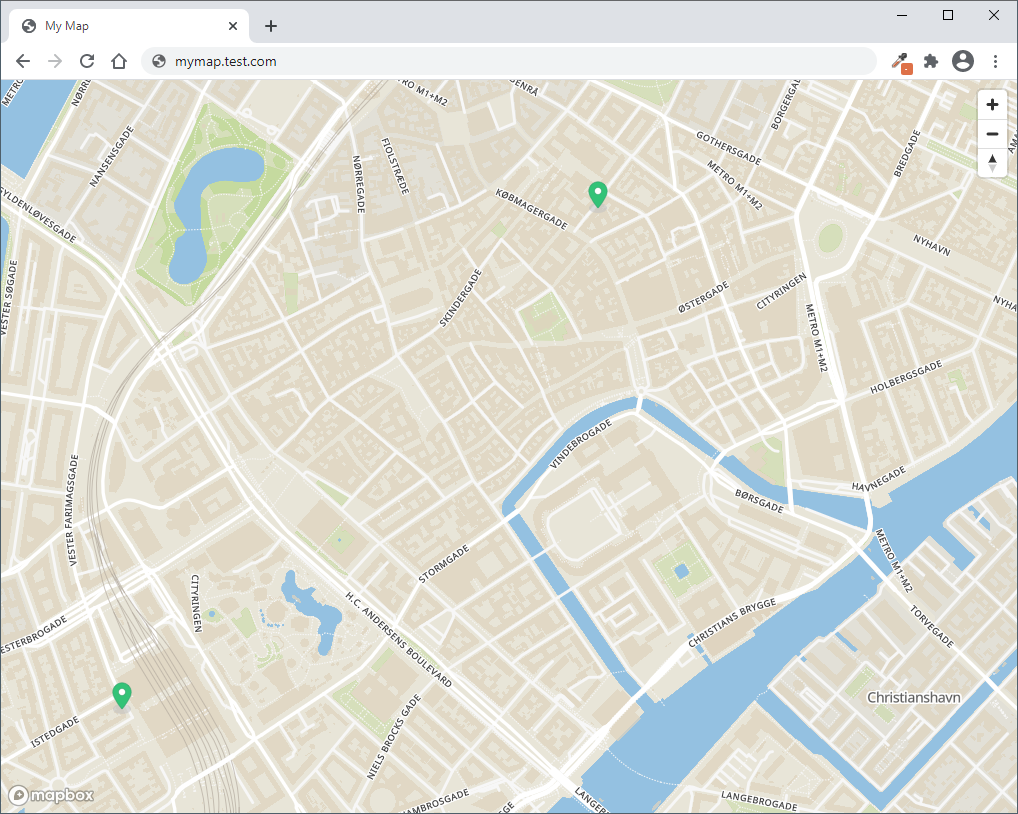
We'll finally create our interactive map using Mapbox GL JS.
To use this API developed by Mapbox, an Access Token is needed. https://docs.mapbox.com/help/getting-started/access-tokens/. Create an account or sign in to yours, and create a token.
The example below shows how to display a map full screen with basic controls. Replace the url to your style and the access token placeholder by yours.
<!DOCTYPE html>
<html>
<head>
    <meta charset='utf-8' />
    <title>My Map</title>
    <meta name='viewport' content='initial-scale=1,maximum-scale=1,user-scalable=no' />
    <script src='https://api.mapbox.com/mapbox-gl-js/v2.1.1/mapbox-gl.js'></script>
    <link href='https://api.mapbox.com/mapbox-gl-js/v2.1.1/mapbox-gl.css' rel='stylesheet' />
    <style>
        body { margin:0; padding:0; }
        #map { position:absolute; top:0; bottom:0; width:100%; }
    </style>
</head>
<body>
    <div id='map'></div>
    <script>
        mapboxgl.accessToken = '<access_token>'

        var map = new mapboxgl.Map({
            container: 'map',
            style: 'http://127.0.0.1:8080/styles/mystyle/style.json',
            center: [12.578, 55.6725],
            zoom: 11
        });

        // Add zoom and rotation controls to the map.
        map.addControl(new mapboxgl.NavigationControl());
    </script>
</body>
</html>
6. Add layers, interactivity, fun features
And turn your setup into a web app with your favorite framework (NodeJS, etc.) The rest is up to your imagination !
Cool stuff
Random cool map suggested by JT: https://openinframap.org/